
演奏の下準備
前回は、PICでスピーカーを駆動し、ドレミファソラシドの音を出すことができました。今回は、それを組み合わせて曲を作っていきます。
使用させていただいた曲は、大人気アニメ「けものフレンズ」のOPテーマ「ようこそジャパリパークへ」です。特徴的なメロディーで曲が開始するので、短いながらも「あっ、けもフレだ!」とすぐ分かり、短時間でいい感じになります。

ドレミ関数の改良
前回は、ドレミそれぞれ1秒間鳴らす関数を作りました。しかしこれでは音の長さの調整が非常にやりにくいです。できれば、0.1秒単位で長さが変えられるといいですね。そこで、こうしましょう。上のコードが前回の「ド」で、下のコードが変更後の「ド」です。
    void do1(){
          for(long i = 1;i<261;i++){
              sound = 1;
              __delay_us(1908);
              sound = 0;
              __delay_us(1908);
          }
      }
    void do1(int time){
       for(long i = 1;i<26*time;i++){
           sound = 1;
           __delay_us(1908);
           sound = 0;
           __delay_us(1908);
       }
   }
変わった点は
- 引数timeの導入
- iのループを1/10にし、time倍にした
という2点です。iのループを1/10にしたのは、1秒単位→0.1秒単位にするためです。それに、新しく導入したtimeと掛け算をすることで、0.1×time秒の長さの音が出せるようになりました。
例えば0.6秒「ド」の音を出したいときは
do1(6);
とすればいいだけです。便利になりました。他の音もこうしましょう。いちいち直すのも面倒なので、以下のコードをそのままコピペすることをお勧めします。
    void do1(int time){
        for(long i = 1;i<26*time;i++){
            sound = 1;
            __delay_us(1908);
            sound = 0;
            __delay_us(1908);
        }
    }
    void re1(int time){
        for(long i = 1;i<29*time;i++){
            sound = 1;
            __delay_us(1700);
            sound = 0;
            __delay_us(1700);
        }
    }
    void mi1(int time){
        for(long i = 1;i<33*time;i++){
            sound = 1;
            __delay_us(1515);
            sound = 0;
            __delay_us(1515);
        }
    }
    void fa1(int time){
        for(long i = 1;i<35*time;i++){
            sound = 1;
            __delay_us(1432);
            sound = 0;
            __delay_us(1432);
        }
    }
    void so1(int time){
        for(long i = 1;i<39*time;i++){
            sound = 1;
            __delay_us(1275);
            sound = 0;
            __delay_us(1275);
        }
    }
    void ra1(int time){
        for(long i = 1;i<44*time;i++){
            sound = 1;
            __delay_us(1136);
            sound = 0;
            __delay_us(1136);
        }
    }
    void Xra1(int time){
        for(long i = 1;i<46*time;i++){
            sound = 1;
            __delay_us(1075);
            sound = 0;
            __delay_us(1075);
        }
    }
    void si1(int time){
        for(long i = 1;i<49*time;i++){
            sound = 1;
            __delay_us(1012);
            sound = 0;
            __delay_us(1012);
        }
    }

    void do2(int time){
        for(long i = 1;i<52*time;i++){
            sound = 1;
            __delay_us(956);
            sound = 0;
            __delay_us(956);
        }
    }
    void re2(int time){
        for(long i = 1;i<58*time;i++){
            sound = 1;
            __delay_us(850);
            sound = 0;
            __delay_us(850);
        }
    }
Xra1()という謎の音をひっそり導入しました。これは、ラの#を表していると思ってください。C言語では関数名に#が使えないので、冒頭にXを付けました。(正直適当に付けたので、好きな関数名に変更して全く構いません。)
実際の演奏・完成プログラム
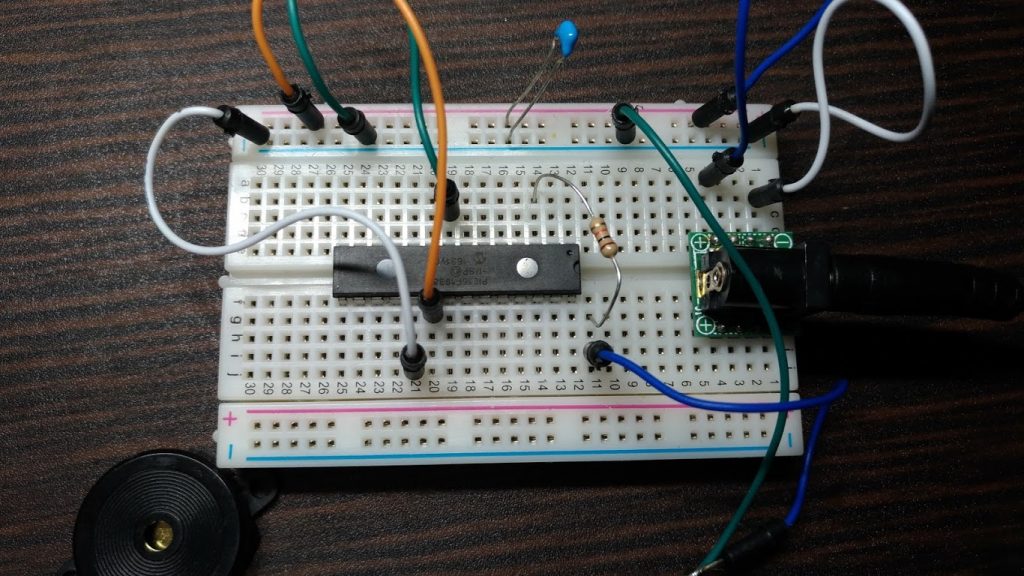
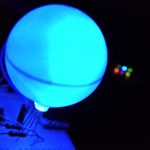
演奏回路
今回の回路は下図のような感じです。前回同様、RA1ピンから抵抗が延び、そこにスピーカーの+側が接続。‐側はそのままGNDに刺しています。
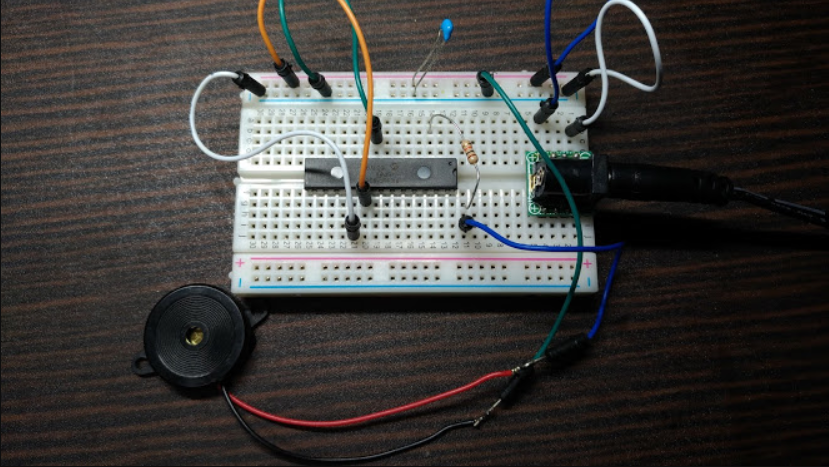

この時の抵抗値ですが、手持ちの好きな抵抗を使って構いません。私が実験したのは夜でしたので、抵抗を10kΩにして音を小さくしました。100Ω程度だとかなりの音量が出ます。爆音で聴きたい方は是非。
完成プログラム
それでは、以上の関数を組み合わせて演奏しましょう。と言っても、楽譜の読み方を教えると日が暮れてしまいますので、そのまま完成プログラムを載せます。コピペ→書き込みで演奏が始まります。
PICへの書き込み方法はこちら PICにプログラムを書き込んでみよう

    // PIC16F1938 Configuration Bit Settings

    // 'C' source line config statements

    // CONFIG1
    #pragma config FOSC = INTOSC    // Oscillator Selection (INTOSC oscillator: I/O function on CLKIN pin)
    #pragma config WDTE = OFF       // Watchdog Timer Enable (WDT disabled)
    #pragma config PWRTE = OFF      // Power-up Timer Enable (PWRT disabled)
    #pragma config MCLRE = OFF      // MCLR Pin Function Select (MCLR/VPP pin function is digital input)
    #pragma config CP = OFF         // Flash Program Memory Code Protection (Program memory code protection is disabled)
    #pragma config CPD = OFF        // Data Memory Code Protection (Data memory code protection is disabled)
    #pragma config BOREN = OFF      // Brown-out Reset Enable (Brown-out Reset disabled)
    #pragma config CLKOUTEN = OFF   // Clock Out Enable (CLKOUT function is disabled. I/O or oscillator function on the CLKOUT pin)
    #pragma config IESO = OFF       // Internal/External Switchover (Internal/External Switchover mode is disabled)
    #pragma config FCMEN = OFF      // Fail-Safe Clock Monitor Enable (Fail-Safe Clock Monitor is disabled)

    // CONFIG2
    #pragma config WRT = OFF        // Flash Memory Self-Write Protection (Write protection off)
    #pragma config VCAPEN = OFF     // Voltage Regulator Capacitor Enable (All VCAP pin functionality is disabled)
    #pragma config PLLEN = OFF// PLL Enable (4x PLL disabled)
    #pragma config STVREN = ON      // Stack Overflow/Underflow Reset Enable (Stack Overflow or Underflow will cause a Reset)
    #pragma config BORV = LO        // Brown-out Reset Voltage Selection (Brown-out Reset Voltage (Vbor), low trip point selected.)
    #pragma config LVP = ON         // Low-Voltage Programming Enable (Low-voltage programming enabled)

    // #pragma config statements should precede project file includes.
    // Use project enums instead of #define for ON and OFF.

    #include <xc.h>
    #define _XTAL_FREQ 8000000L
    #define sound RA1
    void PICinit(){
      OSCCON = 0b01110000;
      ANSELA = 0b00000000;
      ANSELB = 0b00000000;
      TRISA  = 0b00000000;
      TRISB  = 0b00000000;
      TRISC  = 0b00000000;
      PORTA  = 0b00000000;    //2進数で書いた場合
      PORTB  = 0x00;          //16進数で書いた場合
      PORTC  = 0;            //10進数で書いた場合
    }


    void do1(int time){
        for(long i = 1;i<26*time;i++){
            sound = 1;
            __delay_us(1908);
            sound = 0;
            __delay_us(1908);
        }
    }
    void re1(int time){
        for(long i = 1;i<29*time;i++){
            sound = 1;
            __delay_us(1700);
            sound = 0;
            __delay_us(1700);
        }
    }
    void mi1(int time){
        for(long i = 1;i<33*time;i++){
            sound = 1;
            __delay_us(1515);
            sound = 0;
            __delay_us(1515);
        }
    }
    void fa1(int time){
        for(long i = 1;i<35*time;i++){
            sound = 1;
            __delay_us(1432);
            sound = 0;
            __delay_us(1432);
        }
    }
    void so1(int time){
        for(long i = 1;i<39*time;i++){
            sound = 1;
            __delay_us(1275);
            sound = 0;
            __delay_us(1275);
        }
    }
    void ra1(int time){
        for(long i = 1;i<44*time;i++){
            sound = 1;
            __delay_us(1136);
            sound = 0;
            __delay_us(1136);
        }
    }
    void Xra1(int time){
        for(long i = 1;i<46*time;i++){
            sound = 1;
            __delay_us(1075);
            sound = 0;
            __delay_us(1075);
        }
    }
    void si1(int time){
        for(long i = 1;i<49*time;i++){
            sound = 1;
            __delay_us(1012);
            sound = 0;
            __delay_us(1012);
        }
    }

    void do2(int time){
        for(long i = 1;i<52*time;i++){
            sound = 1;
            __delay_us(956);
            sound = 0;
            __delay_us(956);
        }
    }
    void re2(int time){
        for(long i = 1;i<58*time;i++){
            sound = 1;
            __delay_us(850);
            sound = 0;
            __delay_us(850);
        }
    }
    int main(void){
      PICinit();      //PICを初期化
      while(1){
          ra1(3);
          fa1(3);
          __delay_ms(300);
          do1(3);
          do2(3);
          __delay_ms(300);
          ra1(8);
          __delay_ms(1000);

          //begin
            fa1(2);
            mi1(2);
            fa1(2);
            so1(4);
            fa1(2);
            so1(2);
            ra1(4);
            Xra1(2);
            __delay_ms(10);
            Xra1(2);
            do2(4);

            ra1(2);
            so1(2);
            fa1(2);
            fa1(4);
            re2(4);
            do2(4);
            fa1(4);
            re1(4);
            Xra1(4);
            ra1(4);
            so1(4);
            fa1(8);

            __delay_ms(1000);
      }


      return 0;
    }
次回
今回で、PICの使い方初級編は終了です!お疲れさまでした
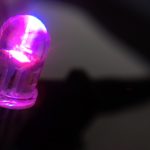
次回からは文字を表示させる液晶,いわゆるLCDを繋いで文字を表示したり、フルカラーLEDで任意の色を出してみたりしていきます。(まずは買い出し物品のリストアップあたりからですかね…)

ピンバック: Wak-tech » PIC16F1938でスピーカーを鳴らしてみた
ピンバック: Wak-tech » コピペで超簡単!PICでI2C接続のLCDを使う
ピンバック: 動けばいい人のためのPICマイコン入門 | Wak-tech
ピンバック: 回路制御班の紹介(制御) – ChibaRobotStudio