PlatformIOを使ってM5Stick-CでBLEとOTAを同時に使おうとしたら若干ハマったので解決策を備忘録として残します。
参考サイト
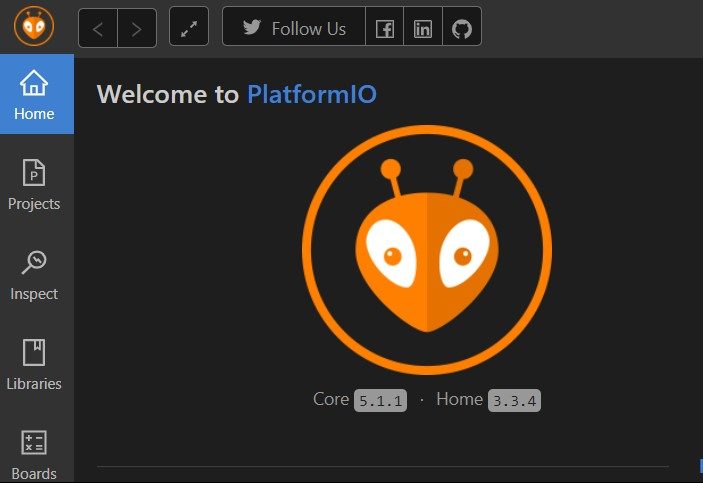
PlatformIOでM5Stick-Cを使うに沿ってインストール・設定します。
PlatformIOでESP32(M5Stick-C)のOTA機能を使うに従い、OTAの設定をしますが、一点異なる設定があります。以下にplatformio.iniを示します。
[env:m5stick-c_ota]
platform = espressif32
board = m5stick-c
framework = arduino
lib_deps =
	m5stack/M5StickC@^0.2.0
monitor_speed = 115200
upload_protocol = espota
upload_port = myesp32
upload_flags =
    --port=3232
board_build.partitions = min_spiffs.csv

[env:m5stick-c]
platform = espressif32
board = m5stick-c
framework = arduino
lib_deps =
	m5stack/M5StickC@^0.2.0
monitor_speed = 115200
board_build.partitions = min_spiffs.csv
両方の環境に以下の1行だけ追加しました。
board_build.partitions = min_spiffs.csv
これはESP32内の4MBのメモリをどう使うか(パーティション)を指定するもので、パーティションテーブルと呼ばれています。
全てのパーティションテーブルはこちら。今回指定したmin_spiffs.csvはSPIFFS領域(htmlファイルとかを格納できる領域)を最小限にして、OTAとプログラム領域を大きく取る設定です。
BluetoothのライブラリとOTA機能は非常に多くのプログラムメモリを消費するため、実はデフォルトの設定では容量オーバーとなってしまいます。上記の設定に変更することで、これらを同時に使用できるようになるわけです。
プログラム
#include <BleKeyboard.h>
#include <Wire.h>
#include <WiFi.h>
#include <ESPmDNS.h>
#include <WiFiUdp.h>
#include <ArduinoOTA.h>
#include <M5StickC.h>

BleKeyboard bleKeyboard("esp32BLE");
const char* ssid = "YOURSSID";
const char* password = "PASSWORD";

void setup() {
  M5.begin();
  M5.Lcd.fillScreen(BLUE);
  Serial.begin(115200);
  Serial.println("Booting");
  WiFi.mode(WIFI_STA);
  WiFi.begin(ssid, password);
  while (WiFi.waitForConnectResult() != WL_CONNECTED) {
    Serial.println("Connection Failed! Rebooting...");
    delay(5000);
    ESP.restart();
  }

  ArduinoOTA.setHostname("myesp32");

  ArduinoOTA
    .onStart([]() {
      String type;
      if (ArduinoOTA.getCommand() == U_FLASH)
        type = "sketch";
      else // U_SPIFFS
        type = "filesystem";

      // NOTE: if updating SPIFFS this would be the place to unmount SPIFFS using SPIFFS.end()
      Serial.println("Start updating " + type);
    })
    .onEnd([]() {
      Serial.println("\nEnd");
    })
    .onProgress([](unsigned int progress, unsigned int total) {
      Serial.printf("Progress: %u%%\r", (progress / (total / 100)));
    })
    .onError([](ota_error_t error) {
      Serial.printf("Error[%u]: ", error);
      if (error == OTA_AUTH_ERROR) Serial.println("Auth Failed");
      else if (error == OTA_BEGIN_ERROR) Serial.println("Begin Failed");
      else if (error == OTA_CONNECT_ERROR) Serial.println("Connect Failed");
      else if (error == OTA_RECEIVE_ERROR) Serial.println("Receive Failed");
      else if (error == OTA_END_ERROR) Serial.println("End Failed");
    });

  ArduinoOTA.begin();

  Serial.println("Ready");
  Serial.print("IP address: ");
  Serial.println(WiFi.localIP());
  M5.Lcd.print(WiFi.localIP());

  bleKeyboard.begin();
}

void loop() {
  ArduinoOTA.handle();
  M5.update();
  if(M5.BtnA.wasPressed()){
    bleKeyboard.write(KEY_MEDIA_VOLUME_UP);
  }
}
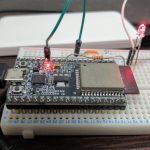
以上のプログラムでは、M5Stick-CをBluetoothキーボードにしています。スマホなどのBluetooth設定で「esp32BLE」と表示されるデバイスに接続できます。M5Stick-Cのメインボタンを押すと音量が上がります。
書き込み
書き込み時に、まずOTAではない環境([env:m5stick-c])を選びます。最初に有線でつないで書き込みましょう。
書き込めたら、OTA環境([env:m5stick-c_ota])に変更しましょう。これ以降はこの環境を使えば有線でつながなくても遠隔で書き込めるようになります。
目次
【PlatformIO】ESP32のOTAとBLEを同時に使う
PlatformIOを使ってM5Stick-CでBLEとOTAを同時に使おうとしたら若干ハマったので解決策を備忘録として残します。
参考サイト
PlatformIOのインストール
PlatformIOでM5Stick-Cを使うに沿ってインストール・設定します。
platformio.iniの設定
PlatformIOでESP32(M5Stick-C)のOTA機能を使うに従い、OTAの設定をしますが、一点異なる設定があります。以下にplatformio.iniを示します。
両方の環境に以下の1行だけ追加しました。
これはESP32内の4MBのメモリをどう使うか(パーティション)を指定するもので、パーティションテーブルと呼ばれています。
全てのパーティションテーブルはこちら。今回指定したmin_spiffs.csvはSPIFFS領域(htmlファイルとかを格納できる領域)を最小限にして、OTAとプログラム領域を大きく取る設定です。
BluetoothのライブラリとOTA機能は非常に多くのプログラムメモリを消費するため、実はデフォルトの設定では容量オーバーとなってしまいます。上記の設定に変更することで、これらを同時に使用できるようになるわけです。
プログラム
以上のプログラムでは、M5Stick-CをBluetoothキーボードにしています。スマホなどのBluetooth設定で「esp32BLE」と表示されるデバイスに接続できます。M5Stick-Cのメインボタンを押すと音量が上がります。
書き込み
書き込み時に、まずOTAではない環境([env:m5stick-c])を選びます。最初に有線でつないで書き込みましょう。
書き込めたら、OTA環境([env:m5stick-c_ota])に変更しましょう。これ以降はこの環境を使えば有線でつながなくても遠隔で書き込めるようになります。