ESP32でRGBLEDを使う
wak-tech Advent Calender 2018 6日目です。
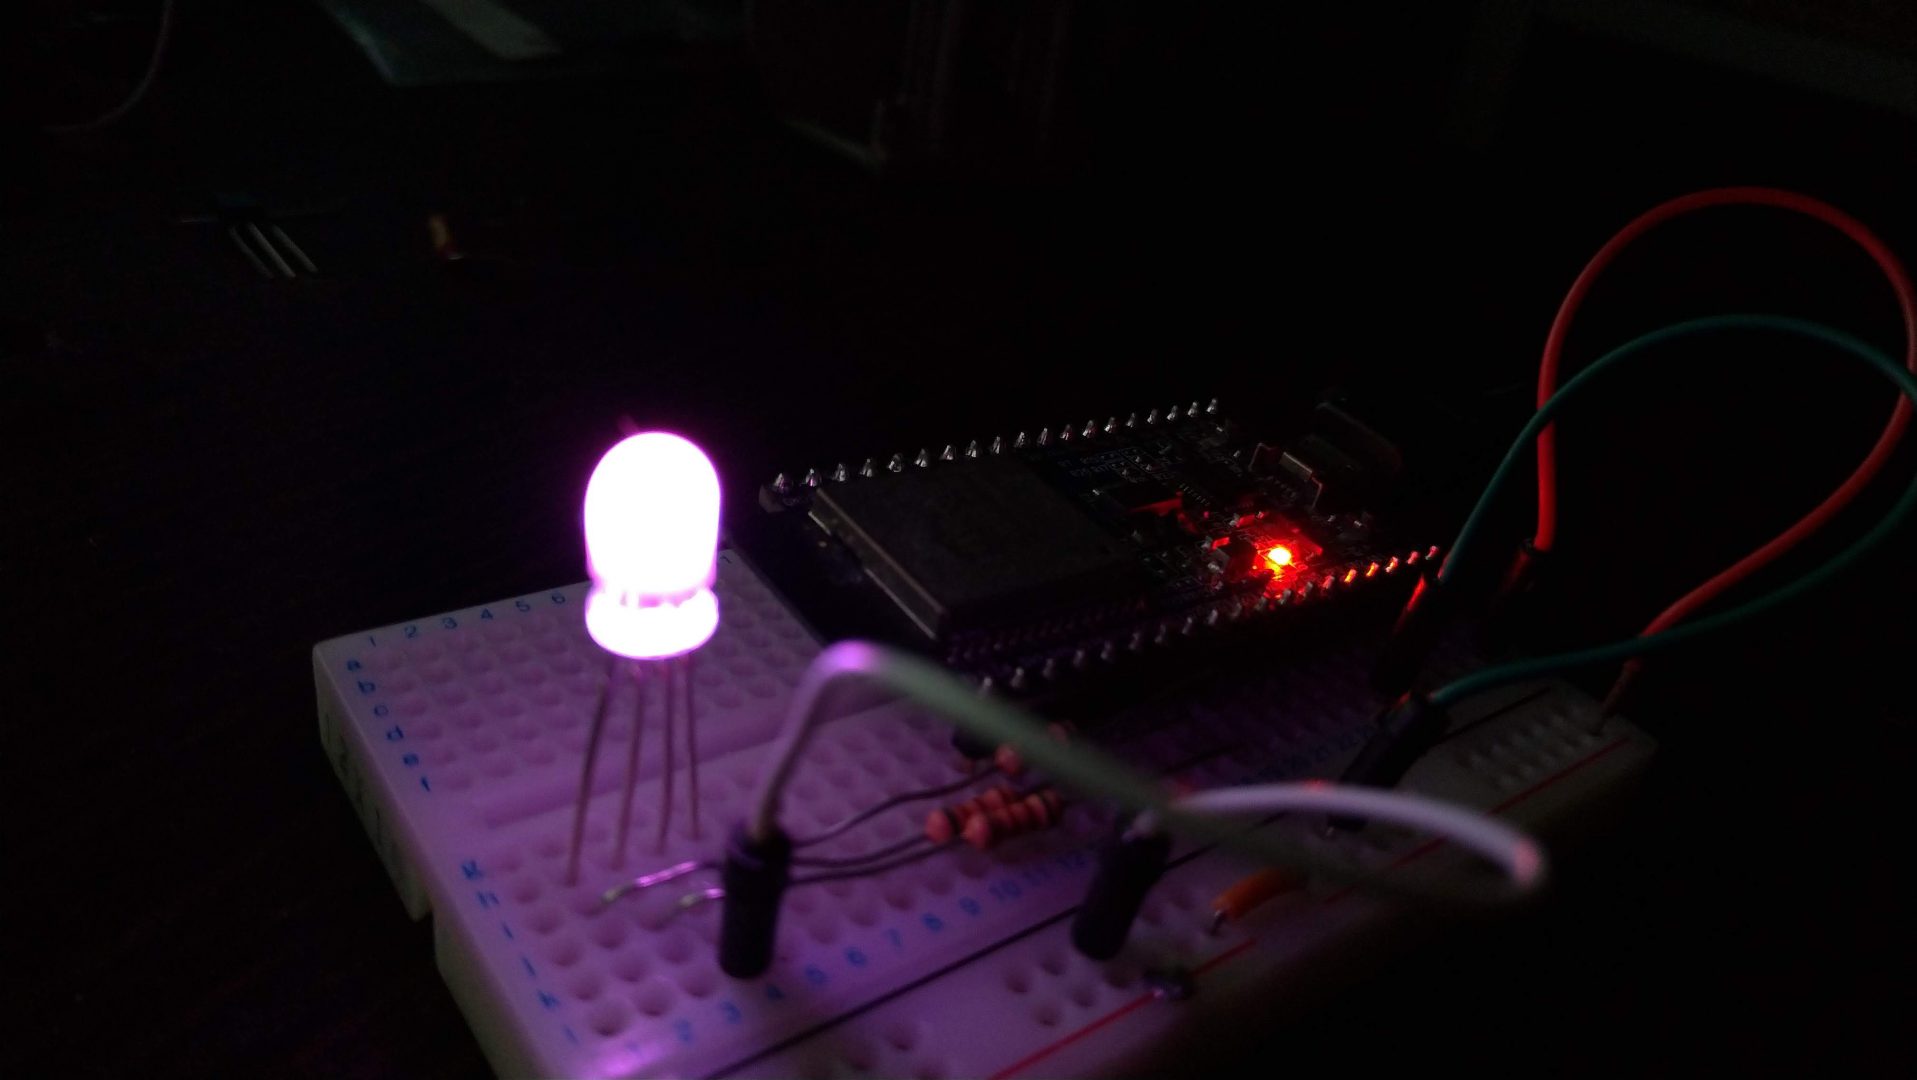
今回はArduinoのサンプルプログラムにあるRBGLEDを光らせるスクリプトを試してみました。
動いている様子
使用部品
EPS32開発ボードの足を全部使うには上記のサンハヤトのブレッドボードが必須です
片足に6マス分ついているのはこのブレッドボードのみで、他では開発ボードの片側しか使えなくなるという罠があります。
回路

RGBLEDの足のうち一番長いのがGNDです。この回路図では右から2番目の足がGNDに当たります。
また、足の色は左から順にG→B→Rです。
詳しくはデータシートをご覧ください。
各LEDに560Ωの抵抗をつけています。これを入れないとLEDが破損するか、電流の流し過ぎでESP32のポートが破壊されるので絶対に入れましょう。電流値的には100Ω程度の抵抗でも大丈夫です。明るくしたい場合は抵抗を低くします。
プログラム
Arduino core for ESP32 に添付されているサンプルプログラムのledcWrite_RGBを用いました。

サンプルプログラムのledR,G,Bのつなぐピンを少し改変しています。
ESP32-WROOM-32
こちらのページにESP32のピン配置が載っています。ledへのPWM出力はアナログ出力に対応したAポートを使う必要があります。Aポートは黄色い背景になっているピンです。
今回はRがA18に、GがA4に、BがA5に繋がっているので、以下のように改変しました。
以下コピペで上記の回路を組めば動きます
/*
  ledcWrite_RGB.ino
  Runs through the full 255 color spectrum for an rgb led
  Demonstrate ledcWrite functionality for driving leds with PWM on ESP32

  This example code is in the public domain.

  Some basic modifications were made by vseven, mostly commenting.
 */

// Set up the rgb led names
uint8_t ledR = A18;
uint8_t ledG = A4;
uint8_t ledB = A5;

uint8_t ledArray[3] = {1, 2, 3}; // three led channels

const boolean invert = true; // set true if common anode, false if common cathode

uint8_t color = 0;          // a value from 0 to 255 representing the hue
uint32_t R, G, B;           // the Red Green and Blue color components
uint8_t brightness = 255;  // 255 is maximum brightness, but can be changed.  Might need 256 for common anode to fully turn off.

// the setup routine runs once when you press reset:
void setup()
{
  Serial.begin(115200);
  delay(10);

  ledcAttachPin(ledR, 1); // assign RGB led pins to channels
  ledcAttachPin(ledG, 2);
  ledcAttachPin(ledB, 3);

  // Initialize channels
  // channels 0-15, resolution 1-16 bits, freq limits depend on resolution
  // ledcSetup(uint8_t channel, uint32_t freq, uint8_t resolution_bits);
  ledcSetup(1, 12000, 8); // 12 kHz PWM, 8-bit resolution
  ledcSetup(2, 12000, 8);
  ledcSetup(3, 12000, 8);
}

// void loop runs over and over again
void loop()
{
  Serial.println("Send all LEDs a 255 and wait 2 seconds.");
  // If your RGB LED turns off instead of on here you should check if the LED is common anode or cathode.
  // If it doesn't fully turn off and is common anode try using 256.
  ledcWrite(1, 255);
  ledcWrite(2, 255);
  ledcWrite(3, 255);
  delay(2000);
  Serial.println("Send all LEDs a 0 and wait 2 seconds.");
  ledcWrite(1, 0);
  ledcWrite(2, 0);
  ledcWrite(3, 0);
  delay(2000);

  Serial.println("Starting color fade loop.");

 for (color = 0; color < 255; color++) { // Slew through the color spectrum

  hueToRGB(color, brightness);  // call function to convert hue to RGB

  // write the RGB values to the pins
  ledcWrite(1, R); // write red component to channel 1, etc.
  ledcWrite(2, G);
  ledcWrite(3, B);

  delay(100); // full cycle of rgb over 256 colors takes 26 seconds
 }

}

// Courtesy http://www.instructables.com/id/How-to-Use-an-RGB-LED/?ALLSTEPS
// function to convert a color to its Red, Green, and Blue components.

void hueToRGB(uint8_t hue, uint8_t brightness)
{
    uint16_t scaledHue = (hue * 6);
    uint8_t segment = scaledHue / 256; // segment 0 to 5 around the
                                            // color wheel
    uint16_t segmentOffset =
      scaledHue - (segment * 256); // position within the segment

    uint8_t complement = 0;
    uint16_t prev = (brightness * ( 255 -  segmentOffset)) / 256;
    uint16_t next = (brightness *  segmentOffset) / 256;

    if(invert)
    {
      brightness = 255 - brightness;
      complement = 255;
      prev = 255 - prev;
      next = 255 - next;
    }

    switch(segment ) {
    case 0:      // red
        R = brightness;
        G = next;
        B = complement;
    break;
    case 1:     // yellow
        R = prev;
        G = brightness;
        B = complement;
    break;
    case 2:     // green
        R = complement;
        G = brightness;
        B = next;
    break;
    case 3:    // cyan
        R = complement;
        G = prev;
        B = brightness;
    break;
    case 4:    // blue
        R = next;
        G = complement;
        B = brightness;
    break;
   case 5:      // magenta
    default:
        R = brightness;
        G = complement;
        B = prev;
    break;
    }
}
最後に
twitterで新着記事が自動通知されるようになっているのでフォローしていただけると喜びます。
ご覧いただきありがとうございました!


ピンバック: ESP32でwebserverを立ち上げてRGBLEDをスマホから調光する【wak-tech Advent Calender 2018】 | Wak-tech
ピンバック: ESP32でお天気ステーションを作ろう | Wak-tech
ピンバック: ESP32で始めるIoT電子工作入門【20個のチュートリアル】 | Wak-tech
ピンバック: ESP32でOpenWeatherMapから天気を取得→LEDの色を天気に合わせて変えてみた | Wak-tech