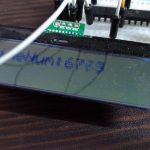
カウントアッププログラム
前回はLCDのコマンドの操作方法を学びました。今回は、少しだけ実用的なカウントアッププログラムを書いていきます。
数字を文字列に変換する(sprintf関数)
まず、カウントアップした変数を文字列に変換しなければなりません。そこで、sprintf関数を使います。使い方は以下
int counter = 0;
char moji[] = '';
sprintf(moji,"hogehoge:%d",counter);
これで、mojiに「hogehoge:0」という文字列が保存されます。第一引数に文字をぶち込みたい配列のポインタ(変数名)、第二引数に文字列、第三引数に文字列内の%なんちゃらに代入したい変数名を入れます。
ただし、sprintf関数を使うには
      #include <stdlib.h>
      #include <stdio.h>
と、この二つのライブラリを読み込む必要があります。
カウントアップした文字をmojiにぶち込む
上のsprintf関数でもうお分かりかと思いますが、これをループ文で囲ってしまえば終了です。
      while(1){
        count++;                  //カウントアップ
        sprintf(moji,"counter:%d",count);     //mojiにcounter:countを代入
        LCD_str(moji);                //mojiを表示
      }
これでLCDには”counter:0″から続いて”counter:1″…と表示される、と思ったら大間違いです。LCD_str()関数は前回の文字の最後からスタートするので、このまま実行するとこんな感じになります。
これを防ぐには、文字を入力してから左上の1文字目に戻る必要があります。これには、writeCommand(ToHome)を使います。このように修正しましょう。
      while(1){
        writeCommand(ToHome);     //画面左上へカーソルを移動
        count++;                  //カウントアップ
        sprintf(moji,"counter:%d",count);     //mojiにcounter:countを代入
        LCD_str(moji);                //mojiを表示
        __delay_ms(1);               //1ms遅延
      }
これで、上手くカウントアップされるはずです。
完成プログラム
    // PIC16F1938 Configuration Bit Settings

    // 'C' source line config statements

    // CONFIG1
    #pragma config FOSC = INTOSC    // Oscillator Selection (INTOSC oscillator: I/O function on CLKIN pin)
    #pragma config WDTE = OFF       // Watchdog Timer Enable (WDT disabled)
    #pragma config PWRTE = OFF      // Power-up Timer Enable (PWRT disabled)
    #pragma config MCLRE = OFF      // MCLR Pin Function Select (MCLR/VPP pin function is digital input)
    #pragma config CP = OFF         // Flash Program Memory Code Protection (Program memory code protection is disabled)
    #pragma config CPD = OFF        // Data Memory Code Protection (Data memory code protection is disabled)
    #pragma config BOREN = OFF      // Brown-out Reset Enable (Brown-out Reset disabled)
    #pragma config CLKOUTEN = OFF   // Clock Out Enable (CLKOUT function is disabled. I/O or oscillator function on the CLKOUT pin)
    #pragma config IESO = OFF       // Internal/External Switchover (Internal/External Switchover mode is disabled)
    #pragma config FCMEN = OFF      // Fail-Safe Clock Monitor Enable (Fail-Safe Clock Monitor is disabled)

    // CONFIG2
    #pragma config WRT = OFF        // Flash Memory Self-Write Protection (Write protection off)
    #pragma config VCAPEN = OFF     // Voltage Regulator Capacitor Enable (All VCAP pin functionality is disabled)
    #pragma config PLLEN = ON// PLL Enable (4x PLL disabled)
    #pragma config STVREN = ON      // Stack Overflow/Underflow Reset Enable (Stack Overflow or Underflow will cause a Reset)
    #pragma config BORV = LO        // Brown-out Reset Voltage Selection (Brown-out Reset Voltage (Vbor), low trip point selected.)
    #pragma config LVP = ON         // Low-Voltage Programming Enable (Low-voltage programming enabled)

    // #pragma config statements should precede project file includes.
    // Use project enums instead of #define for ON and OFF.

    #include <xc.h>
    #include <pic16f1938.h>
    #include <stdlib.h>
    #include <stdio.h>
    #define _XTAL_FREQ 32000000
    #define LCD_ADD 0x7C
    #define ToHome 0b00000010
    #define shiftLeft 0b00011000
    #define shiftRight 0b00011100
    #define clear 0b00000001

    char moji[] = " ";
    void I2C_Master_Init(const unsigned long c)
    {
      SSPCON1 = 0b00101000;
      SSPCON2 = 0;
      SSPADD = (_XTAL_FREQ/(4*c))-1;
      SSPSTAT = 0b00000000 ;    // 標準速度モードに設定する(100kHz)
    }

    void I2C_Master_Wait()
    {
      while ((SSPSTAT & 0x04) || (SSPCON2 & 0x1F));
    }

    void I2C_Master_Start()
    {
      I2C_Master_Wait();
      SEN = 1;
    }

    void I2C_Master_RepeatedStart()
    {
      I2C_Master_Wait();
      RSEN = 1;
    }

    void I2C_Master_Stop()
    {
      I2C_Master_Wait();
      PEN = 1;
    }

    void I2C_Master_Write(unsigned d)
    {
      I2C_Master_Wait();
      SSPBUF = d;
    }
    void writeData(char t_data){
        I2C_Master_Start();
        I2C_Master_Write(LCD_ADD);
        I2C_Master_Write(0x40);
        I2C_Master_Write(t_data);
        I2C_Master_Stop();
        __delay_ms(1);
    }
    void writeCommand(char t_command){
        I2C_Master_Start();
        I2C_Master_Write(LCD_ADD);
        I2C_Master_Write(0x00);
        I2C_Master_Write(t_command);
        I2C_Master_Stop();
        __delay_ms(10);
    }
    void PICinit(){
      OSCCON = 0b01110000;
      ANSELA = 0b00000000;
      ANSELB = 0b00000000;
      TRISA  = 0b00000000;
      TRISB  = 0b00000000;
      TRISC  = 0b00011000;
      PORTA  = 0b00000000;    //2進数で書いた場合
      PORTB  = 0x00;          //16進数で書いた場合
    }
    void LCD_Init(){            //LCDの初期化
      I2C_Master_Init(100000);
      __delay_ms(400);
      writeCommand(0x38);
      __delay_ms(20);
      writeCommand(0x39);
      __delay_ms(20);
      writeCommand(0x14);
      __delay_ms(20);
      writeCommand(0x73);
      __delay_ms(20);
      writeCommand(0x52);
      __delay_ms(20);
      writeCommand(0x6C);
      __delay_ms(250);
      writeCommand(0x38);
      __delay_ms(20);
      writeCommand(0x01);
      __delay_ms(20);
      writeCommand(0x0C);
      __delay_ms(20);
    }

    void LCD_str(char *c) {     //LCDに配列の文字を表示
      unsigned char i,wk;
      for (i=0 ; ; i++) {
        wk = c[i];
        if  (wk == 0x00) {break;}
        writeData(wk);
      }
    }

    int main(void){
      PICinit();      //PICを初期化
      LCD_Init();
      writeCommand(0x01); //画面をクリア
      __delay_ms(20);
      writeCommand(0x02); //ホームへカーソル移動
      __delay_ms(2); // LCD側の処理待ち
      int count = 0;
      __delay_ms(1000);
    while(1){
      writeCommand(ToHome);     //画面左上へカーソルを移動
      count++;                  //カウントアップ
      sprintf(moji,"counter:%d",count);     //mojiにcounter:countを代入
      LCD_str(moji);                //mojiを表示
      __delay_ms(1);               //1ms遅延
    }
      return 0;
    }
完成動画
これで、変数のLCDへの表示も完璧ですね。変化する文字列に関しても、sprintf関数内の%dを%sに変えれば対応できます。ぜひ、タイマーなどを作ってみて…とはいきません。__delay_ms(1000)にして1秒ごとにカウントアップしたつもりでも、実際はsprintfの変換にかかる時間や、LCDへコマンドを送る時間だけ遅れが生じてしまいます。
では、どうすれば正確な時間でカウントアップできるのでしょうか。これは、タイマー割り込みという機能を使うと実現できます。これに関してはまた後日記事を書きます。
次回は、RGBLEDを使って遊んでみましょう!


